チュートリアル:一覧画面を作成する(modern)
これからclassicで作った画面の、modern版を作成していきます。
まずはメモ一覧画面です。
モデル、ストアを作成する
ここはclassicのときと同じです。ただし、プロキシを一旦memoryに戻します。
ビューコントローラを作る頃に、またlocalstorageにします。
作成するのはmodern/src/model/Memo.jsとmodern/src/store/Memo.jsになります。
/**
 * メモモデルクラス。
 *
 * @class Memo.model.Memo
 * @extend Ext.data.Model
 */
Ext.define('Memo.model.Memo', {
    extend: 'Ext.data.Model',

    fields: [
        {
            name: 'id',
            type: 'int'
        },
        {
            name: 'title',
            type: 'string'
        },
        {
            name: 'body',
            type: 'string'
        }
    ]
});

/**
 * メモストアクラス。
 *
 * @class Memo.store.Memo
 * @extend Ext.data.Store
 */
Ext.define('Memo.store.Memo', {
    extend: 'Ext.data.Store',

    requires: [
        'Memo.model.Memo'
    ],

    model: 'Memo.model.Memo',

    proxy: 'memory',

    data: [
        { id: 1, title: 'タイトル1', body: '本文1' },
        { id: 2, title: 'タイトル2', body: '本文2' },
        { id: 3, title: 'タイトル3', body: '本文3' }
    ]
});
一覧画面を作成する
一覧部分のビューとしては、Ext.Listクラスを使えます。
Ext.ListはExt.dataview.Listの別名です。
classicのExt.view.Viewと同じように使えます。
/**
 * メモ一覧リストクラス。
 *
 * @class Memo.view.list.List
 * @extend Ext.List
 */
Ext.define('Memo.view.list.List', {
    extend: 'Ext.List',
    xtype: 'list_list',

    cls: 'list-list',

    itemTpl: [
        '<h2 class="title">{title}</h2>',
        '<p class="body">{body}</p>'
    ],

    store: 'Memo'
});

/**
 * メモ一覧パネルクラス。
 *
 * @class Memo.view.list.Panel
 * @extend Ext.Panel
 */
Ext.define('Memo.view.list.Panel', {
    extend: 'Ext.Panel',
    xtype: 'list_panel',

    requires: [
        'Memo.view.list.List'
    ],

    title: 'メモ一覧',

    items: {
        xtype: 'list_list'
    }
});

/**
 * メインパネルクラス。
 *
 * @class Memo.view.main.Main
 * @extend Ext.Panel
 */
Ext.define('Memo.view.main.Main', {
    extend: 'Ext.Panel',
    xtype: 'app_main',

    requires: [
        'Memo.view.list.Panel'
    ],

    items: [
        {
            xtype: 'list_panel'
        }
    ]
});
itemTplで、ストアの1件分のモデルのデータを表示するHTMLのテンプレート部分を定義します。
ストアには、先に作成したものを指定しています。なので、アプリケーションクラスにストアの定義を追加する必要があります。
/**
 * アプリケーションクラス。
 *
 * @class Memo.Application
 * @extend Ext.app.Application
 */
Ext.define('Memo.Application', {
    extend: 'Ext.app.Application',

    name: 'Memo',

    stores: [
        'Memo'
    ]
});
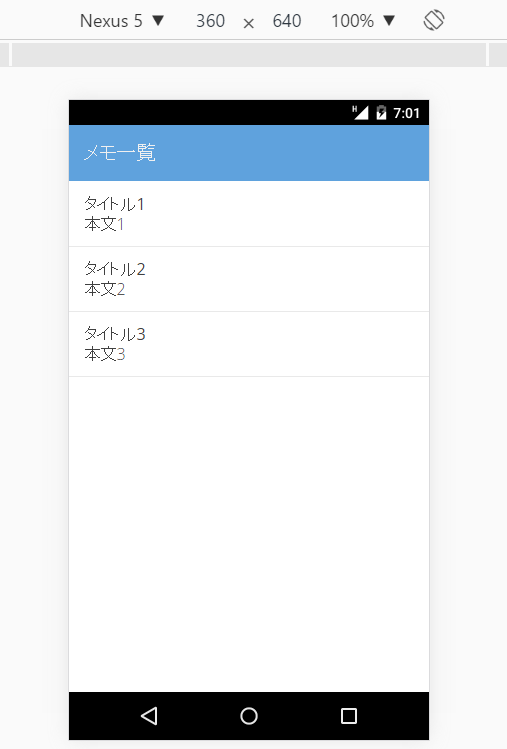
これでhttp://localhost:1841にアクセスすると、↓のようになりました。

今回はここまで。次回は登録画面を作成してみます。